Context menus for Visio shapes
Some Visio shapes have one or more custom options in the context menu that you can find with a right mouse click. But how are these menus made? The short answer is that the Visio ShapeSheet for the shape makes this possible.
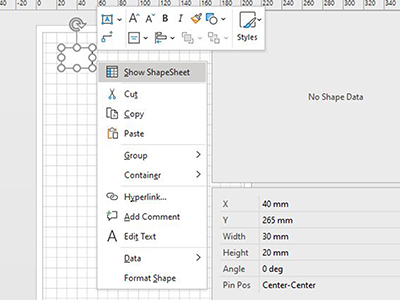
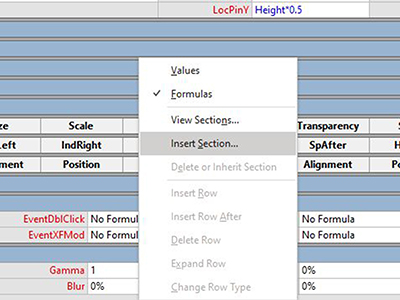
Let's assume you already have the developer option in Visio switched on. Through a right-click on the shape (for example a rectangle), you choose Show ShapeSheet. Inside the new ShapeSheet window, you can add the sections by right-clicking anywhere on the ShapeSheet and selecting Insert Section...
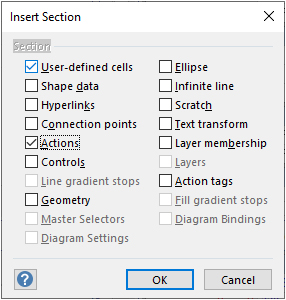
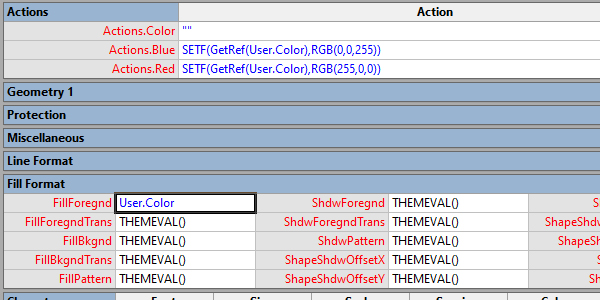
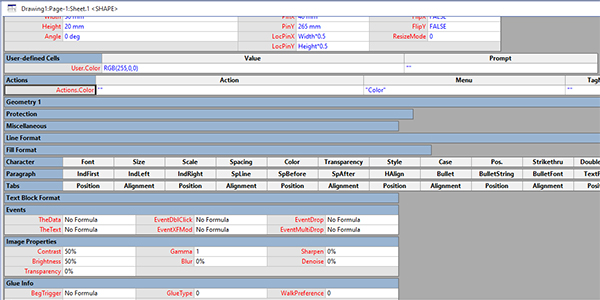
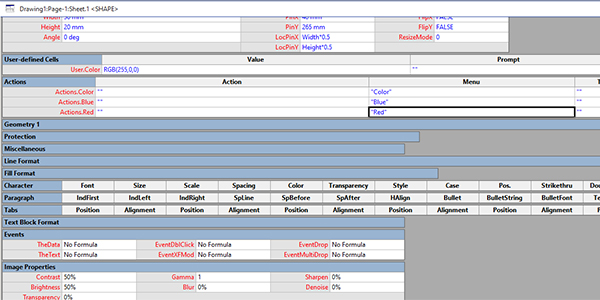
For this example, we are going to use the User-defined cells section and the Action section. In the ShapeSheet you can rename the User.Row_1 value. We are going to change this in Color. You only have to type Color. Visio will add the user-part. For the Value in this row you enter '=RGB(255,0,0)' (of course without the quotes). We write this as follows:
User.Color = RGB(255,0,0)
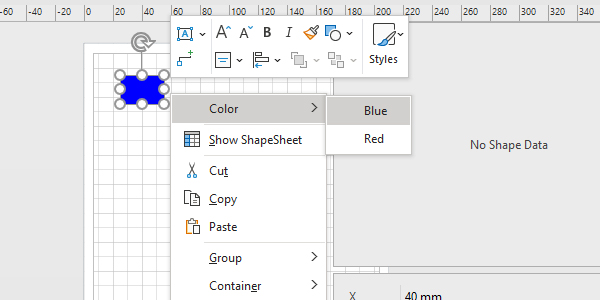
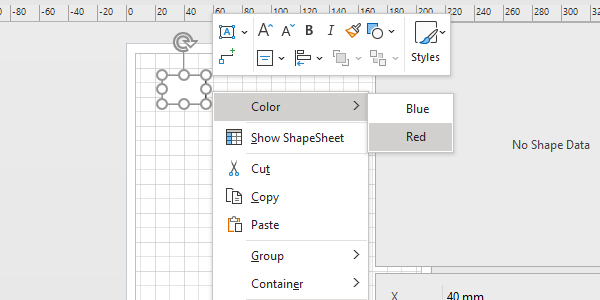
For ease of working we change the Actions.Row_1 into Actions.Color as well. Next, we add the first part of our menu to the shape. This will be the word "Color" in the Menu-field of the Actions.Color row. If you go back to the rectangle in the drawing and right-click on the shape, you see the menu "Color" is added.
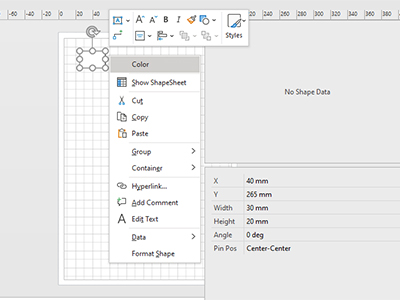
A working menu
This menu doesn't work yet. It literally does nothing. We are now going to add 2 sub-menus to change the color of the shape. The first step is adding two actions. You can do this by right-clicking on the first action row in the ShapeSheet and then select Insert Row. Row_2 and Row_3 are added. Change row names in Blue and Red. Also, change the corresponding Menu values for these rows in Blue and Red.
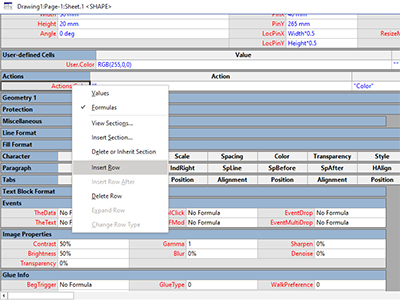
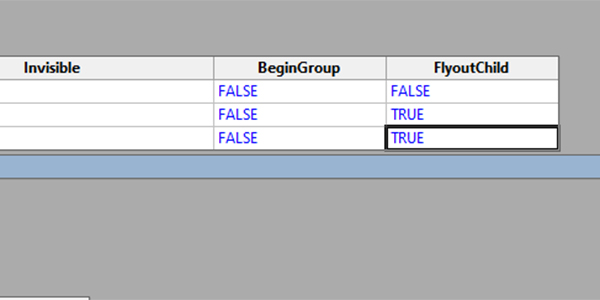
The next steps are where the magic is happening. We need 3 more steps to have a working sub-menu that actually does something. Step one: putting the newly created menu items in a sub-menu. This is done by changing the value for FlyoutChild for Action.Blue and Action.Red to TRUE. You can do this by just typing "1" instead of writing the word TRUE.
Step two: make the action. The action is done by using the SETF-function. Here we change the value of User.Color into RGB(0,0,255). In the Action-field for Action.Blue you write:
=SETF(GetRef(User.Color),RGB(0,0,255))
For the Action-field in Action.Red it is about the same:
=SETF(GetRef(User.Color),RGB(255,0,0))
You can now test on the shape and see the value for User.Color change in the ShapeSheet. To have the color of the shape change to the color we put in User.Color, we can apply step 3: change the THEMEVAL()-value in the Fill Format section in =User.Color to have it working. An easy way to do this is by wrinting the "=" in the cell and then click on User.Color in the ShapeSheet. The reference is added for you.